
Exporting Metorik Data to Google Sheets
Using a combination of Metorik's automatic exports & Mailparser, you are able to export your store's data directly into Google Sheets. This way, you can have one Google Sheet that is constantly updated with the data from your automated exports.
For this example, let's build a spreadsheet that adds all orders that have just moved to the processing status which are ready to be shipped. This way our fulfillment team can keep track of everything from one shared sheet.
The flow of the automation will be:
Create an automatic export from Metorik of orders that moved into processing yesterday.
The export sends to a Mailparser inbox, instead of your own email address.
Mailparser then parses the attached CSV.
Mailparser then uploads this to your Google Sheets.
Set up the integration
Follow these steps to connect Metorik to Google Sheets via Mailparser:
Create a Mailparser Account
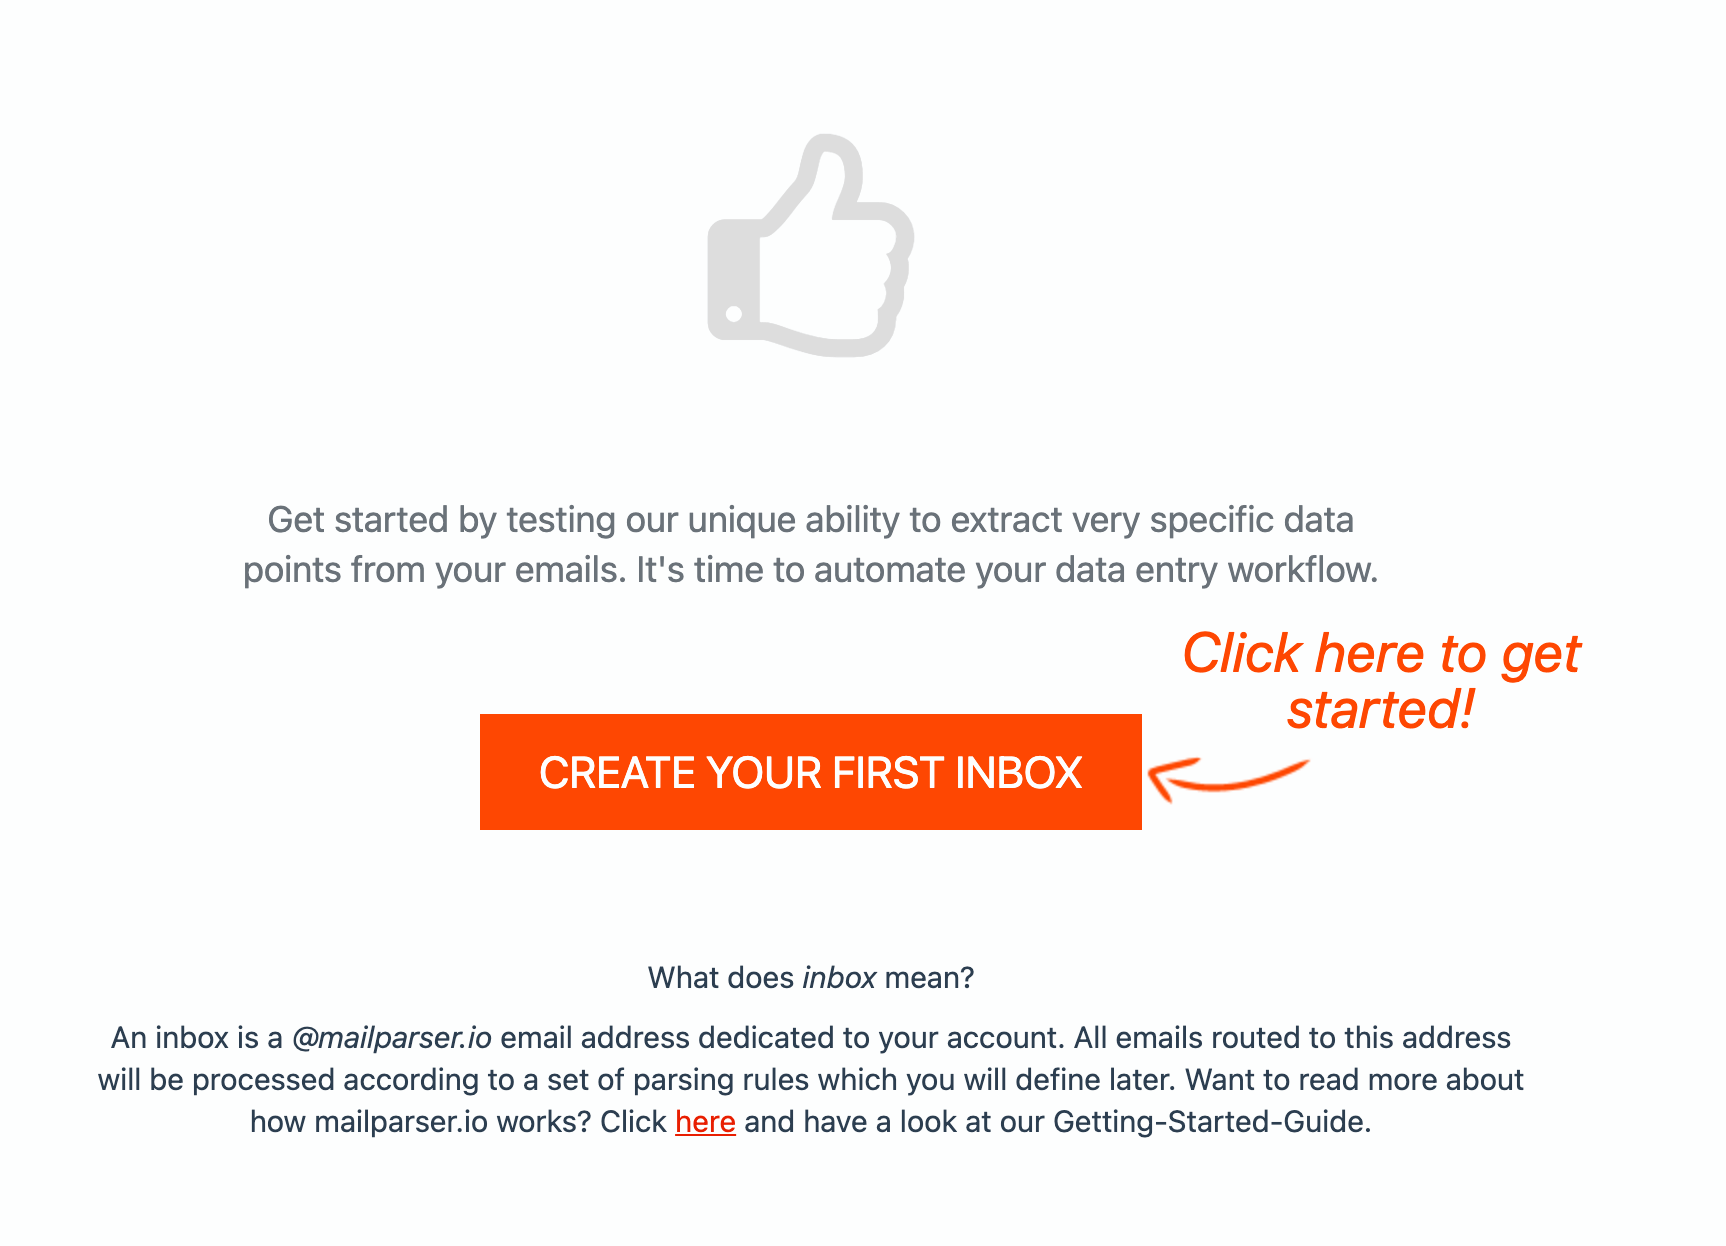
Head to Mailparser and create a free account — https://mailparser.io/.
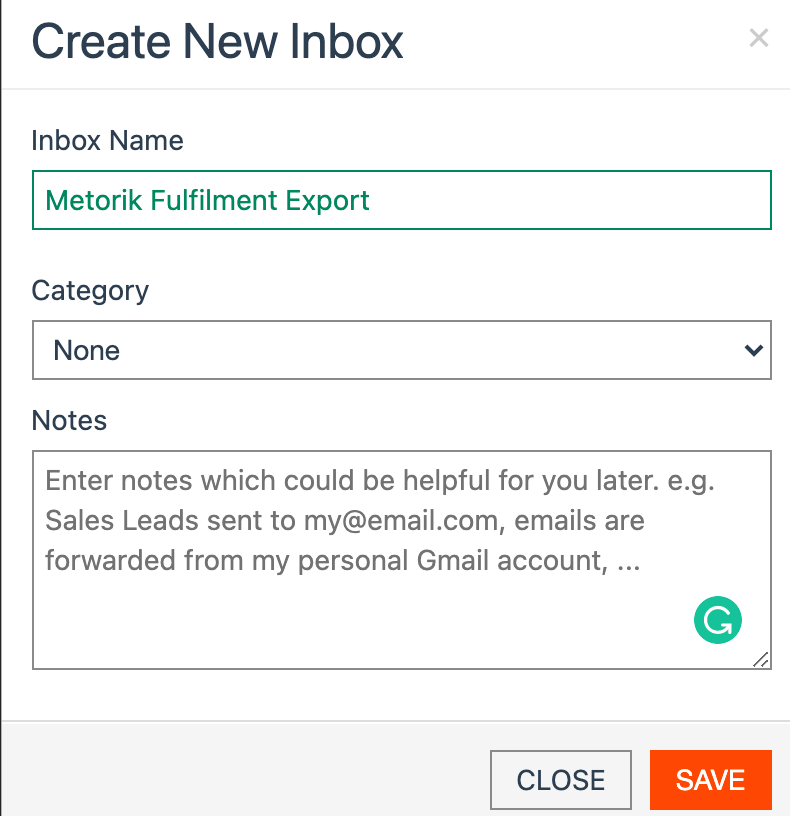
Once you have created the account, you will then be prompted to create your first inbox:
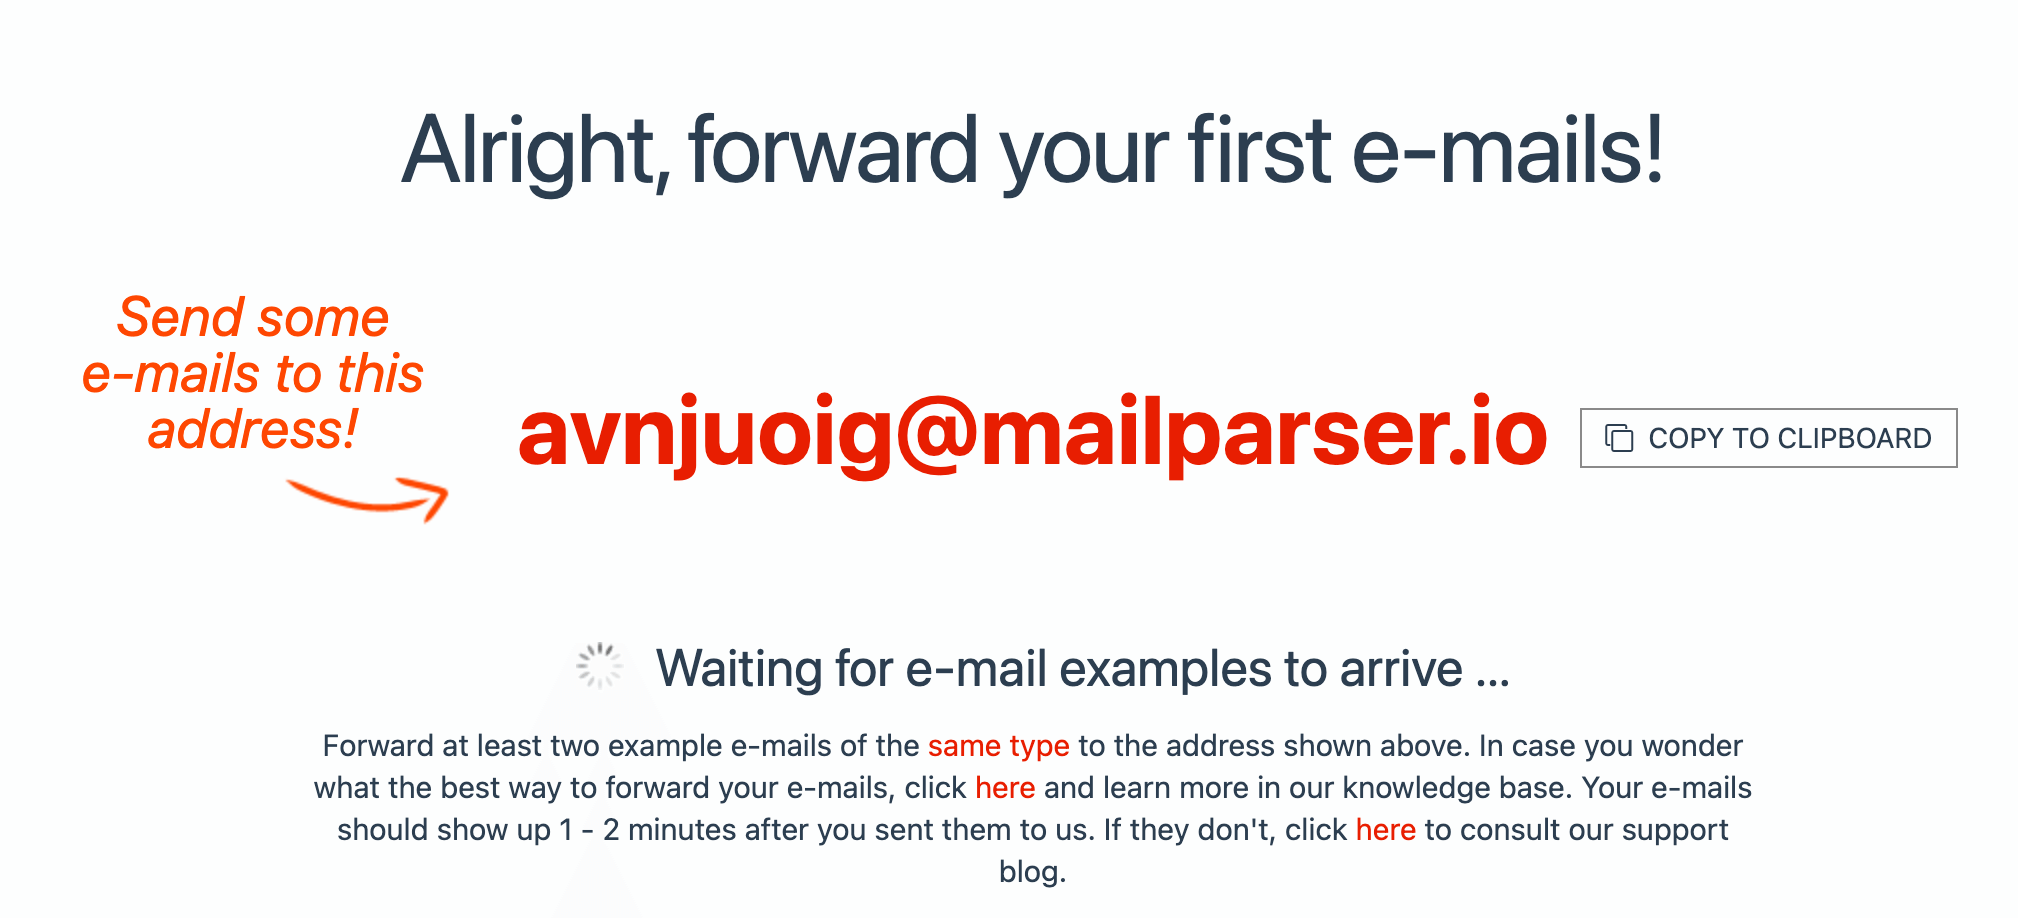
Once you have done this, you will get an email address. This is what we are going to use as the email address in our Metorik export:
Create a Metorik automatic export
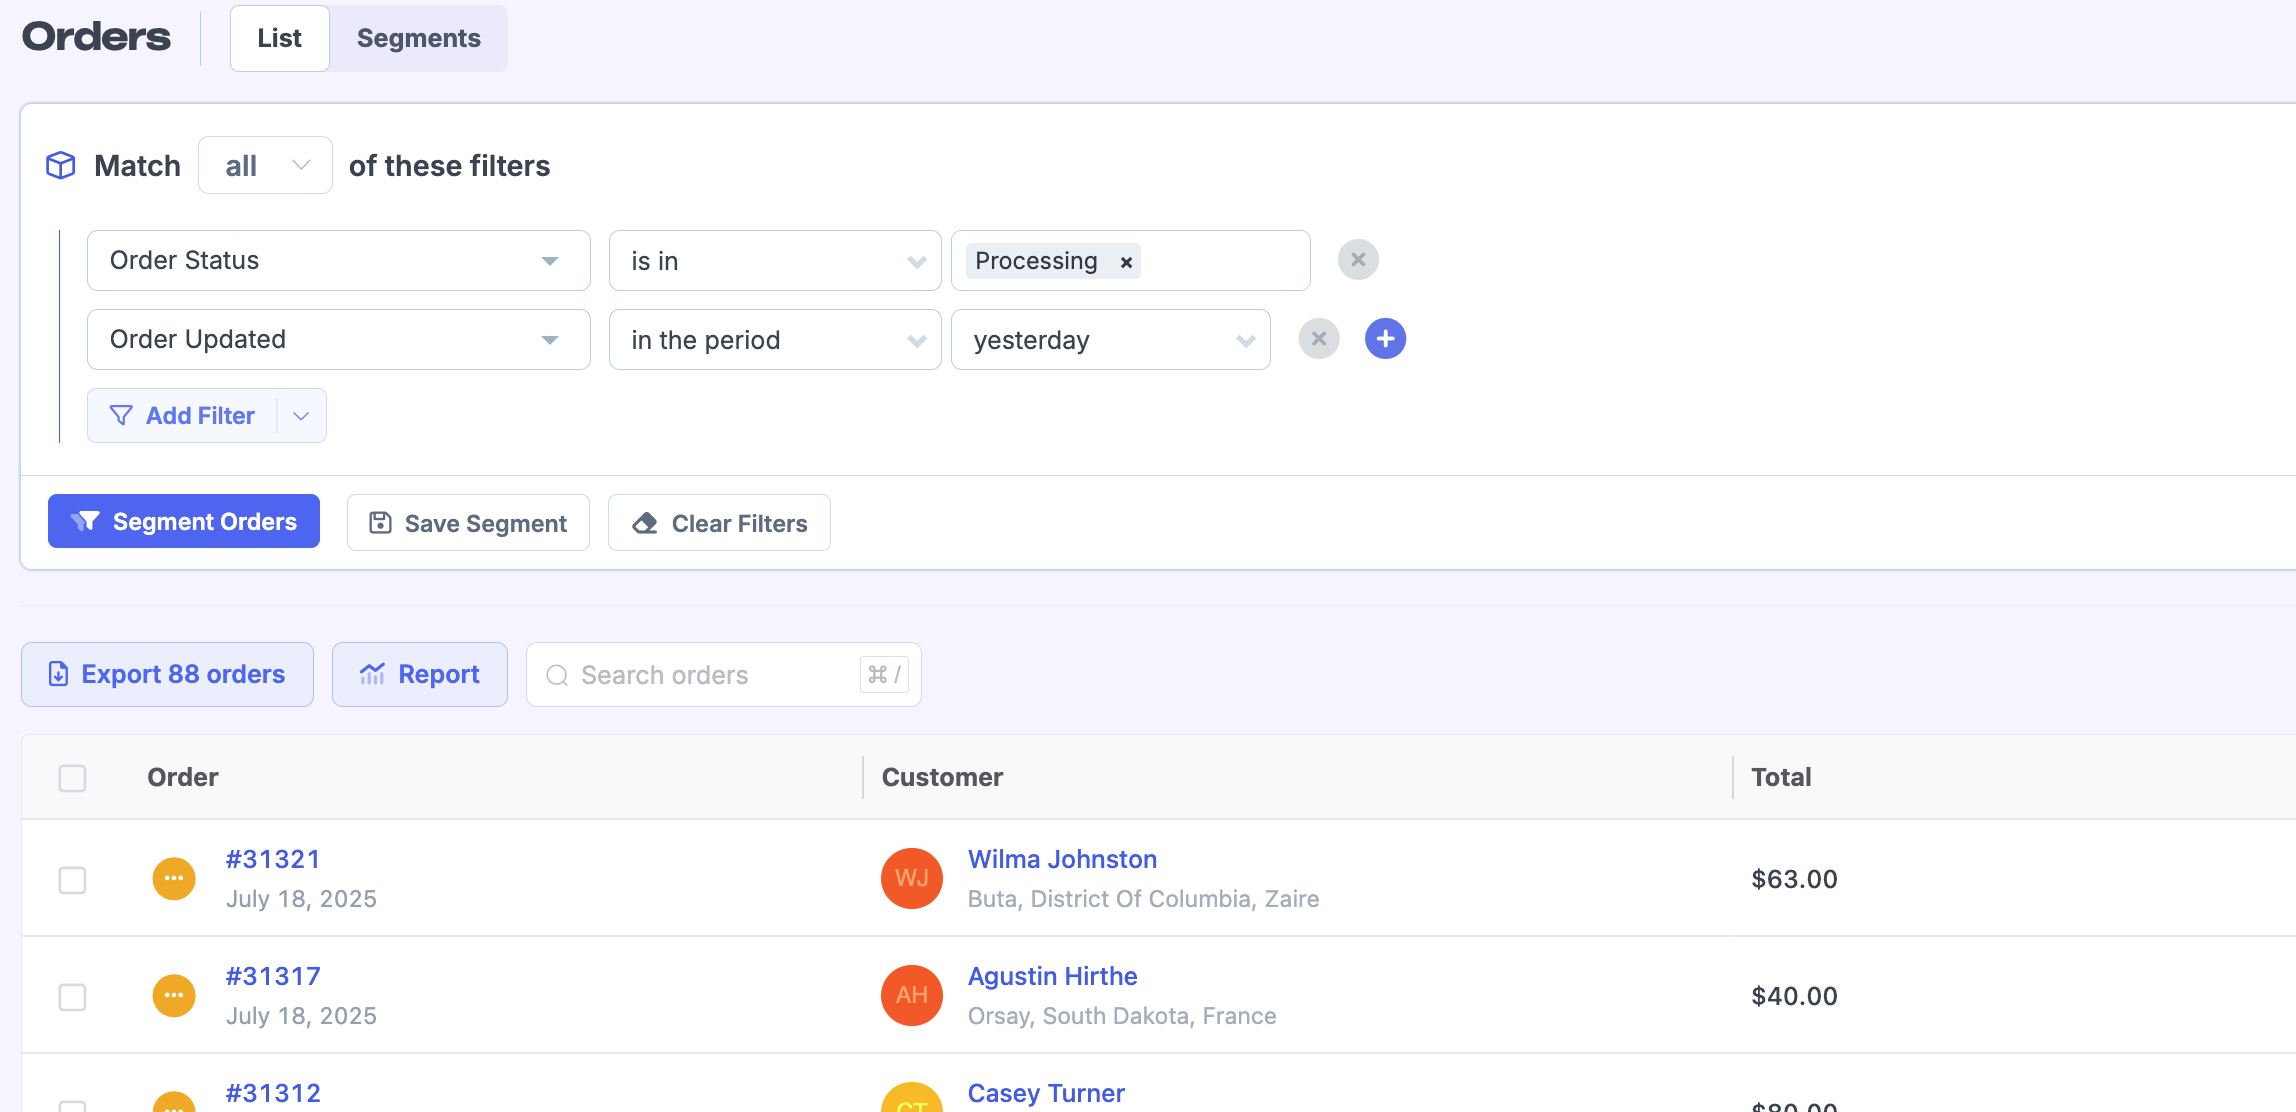
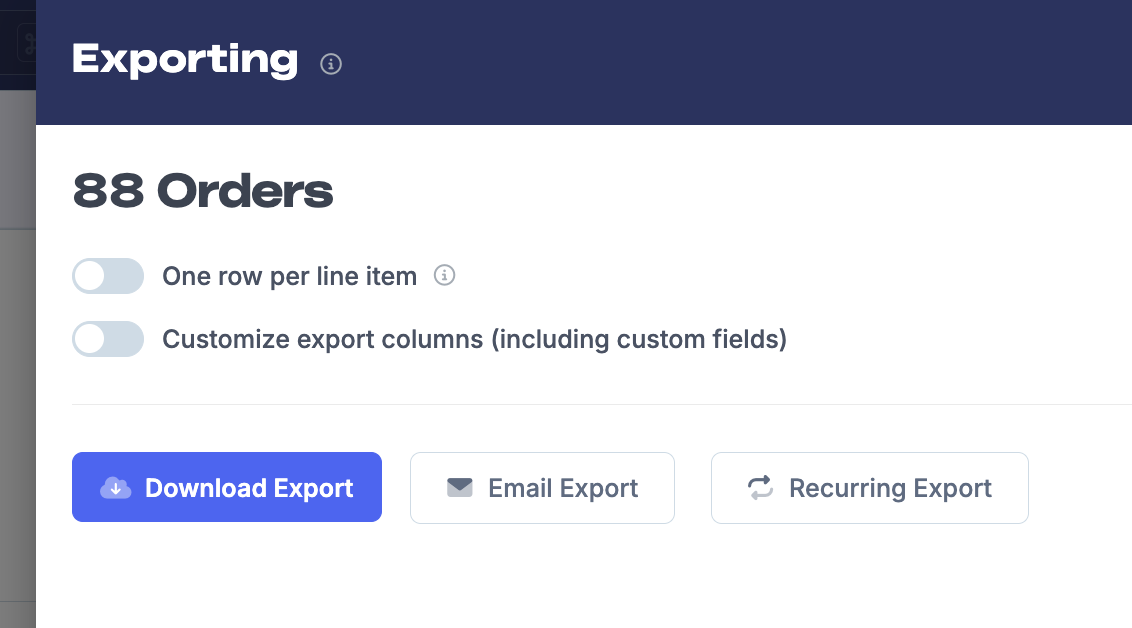
Head to your Metorik account to create the segment and export. Since we want processing orders for this example, let's head to our orders page. Here is my segment:
Click Export orders and an Exporting settings area will popup:
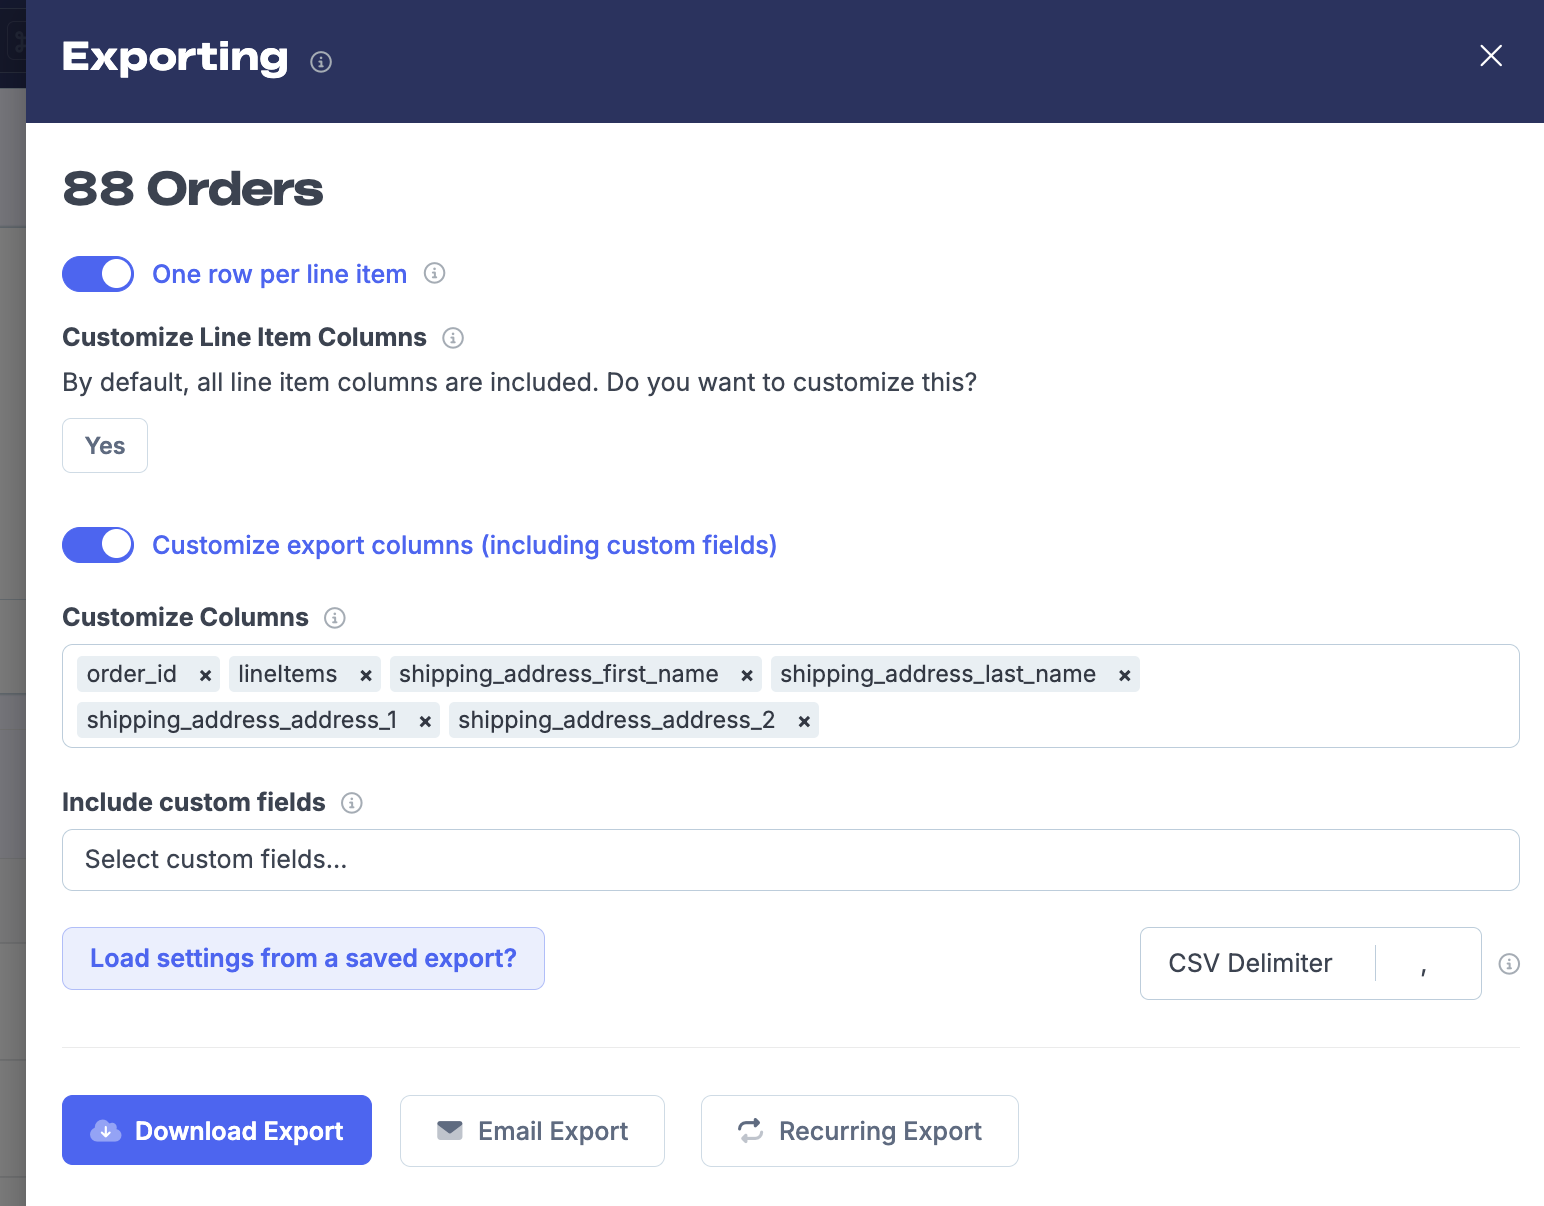
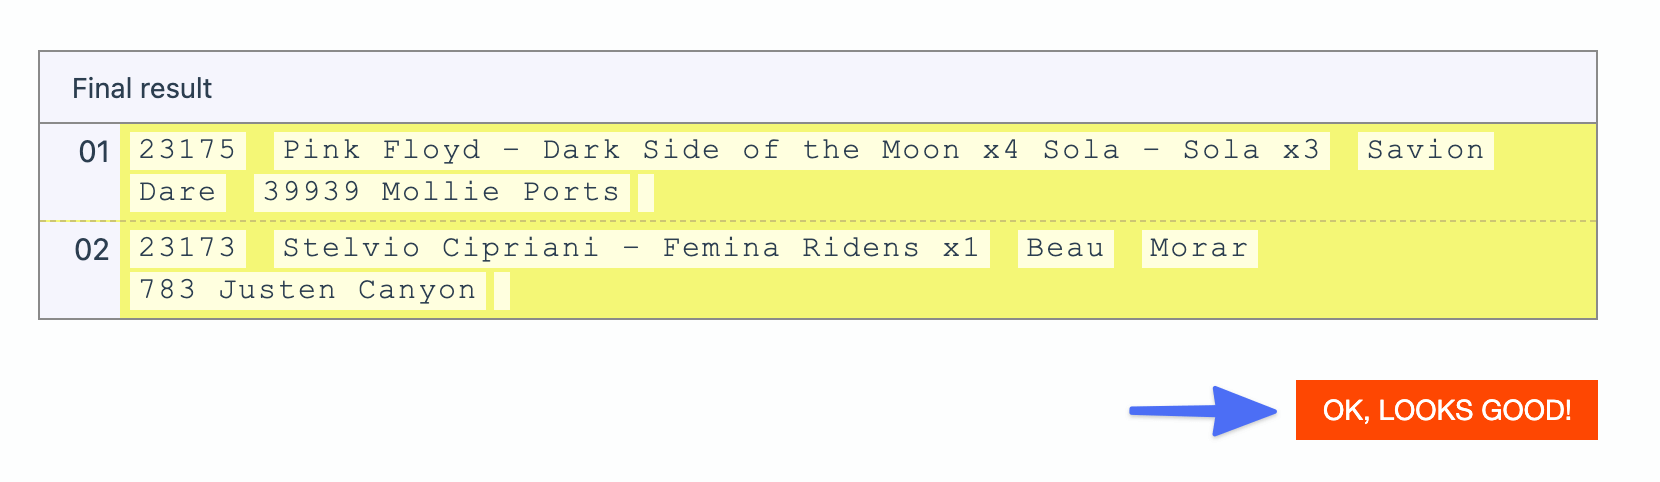
From here, you can customize which columns to include. I'm going to include the Order ID, Line Items, Shipping First Name, Shipping Last Name, Shipping Address 1, and Shipping Address 2:
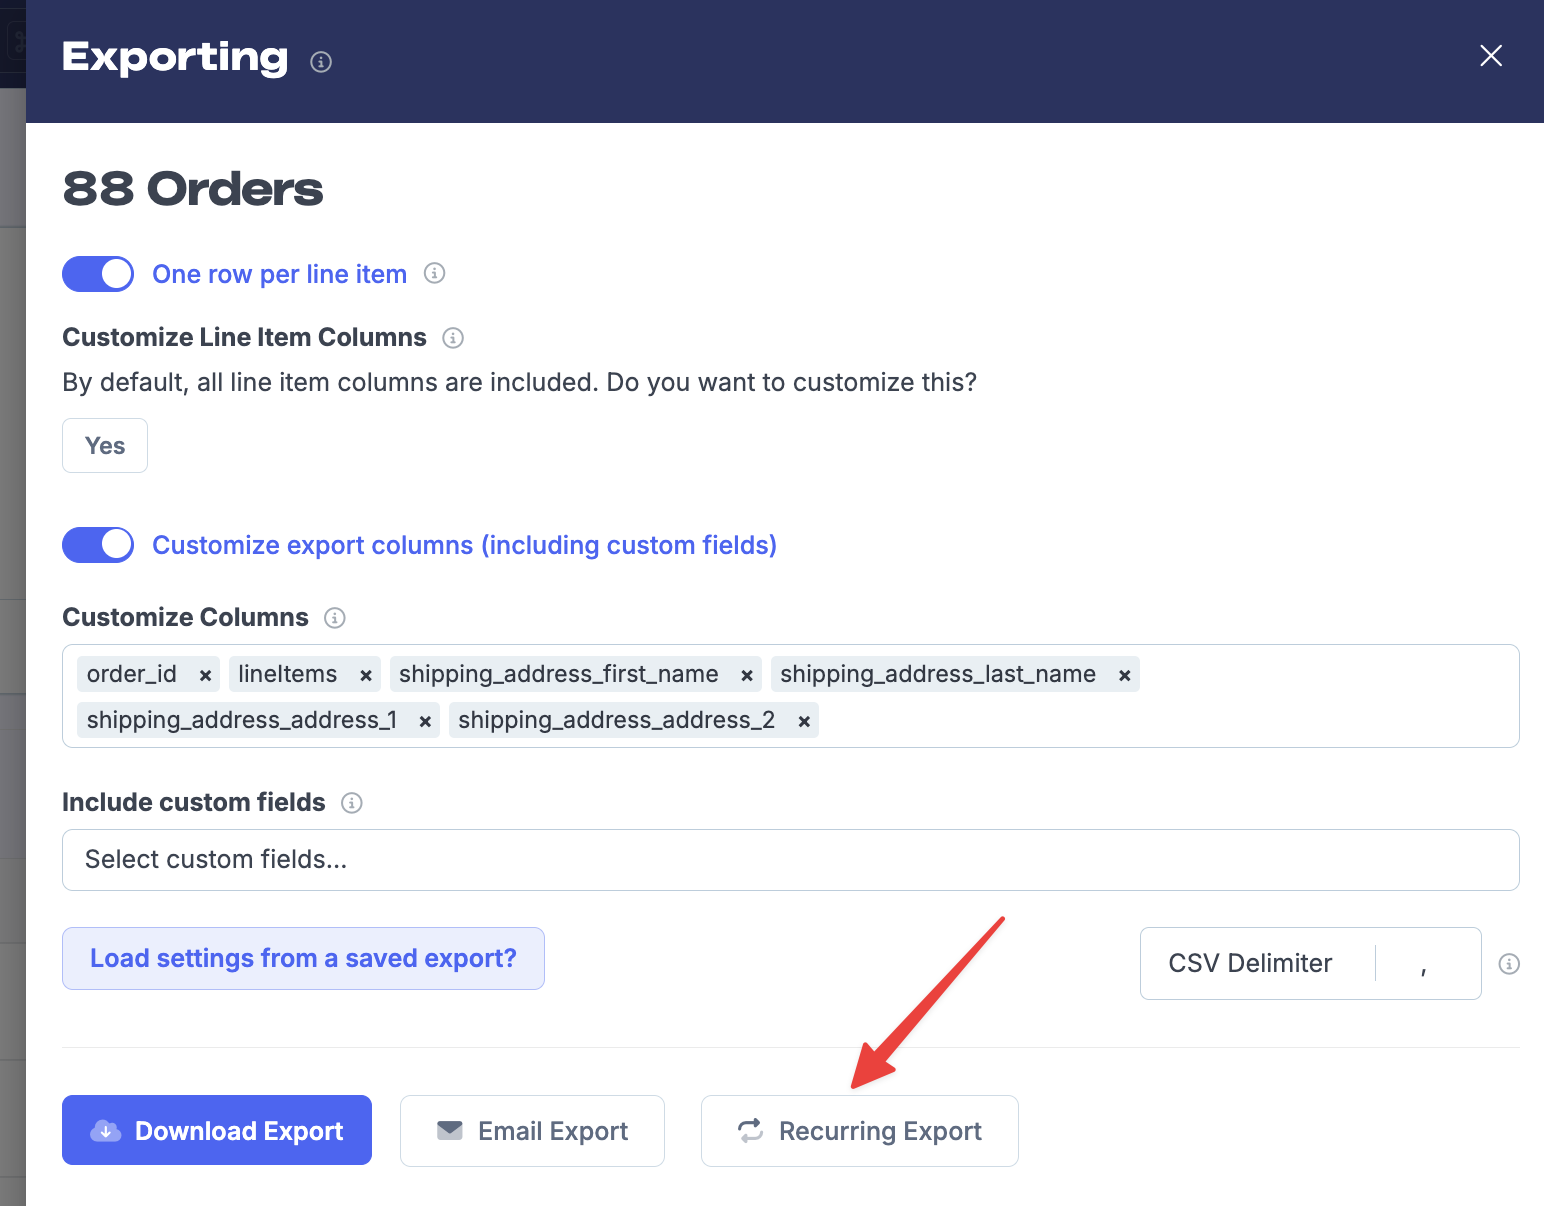
Now click Create a Recurring Automatic Export:
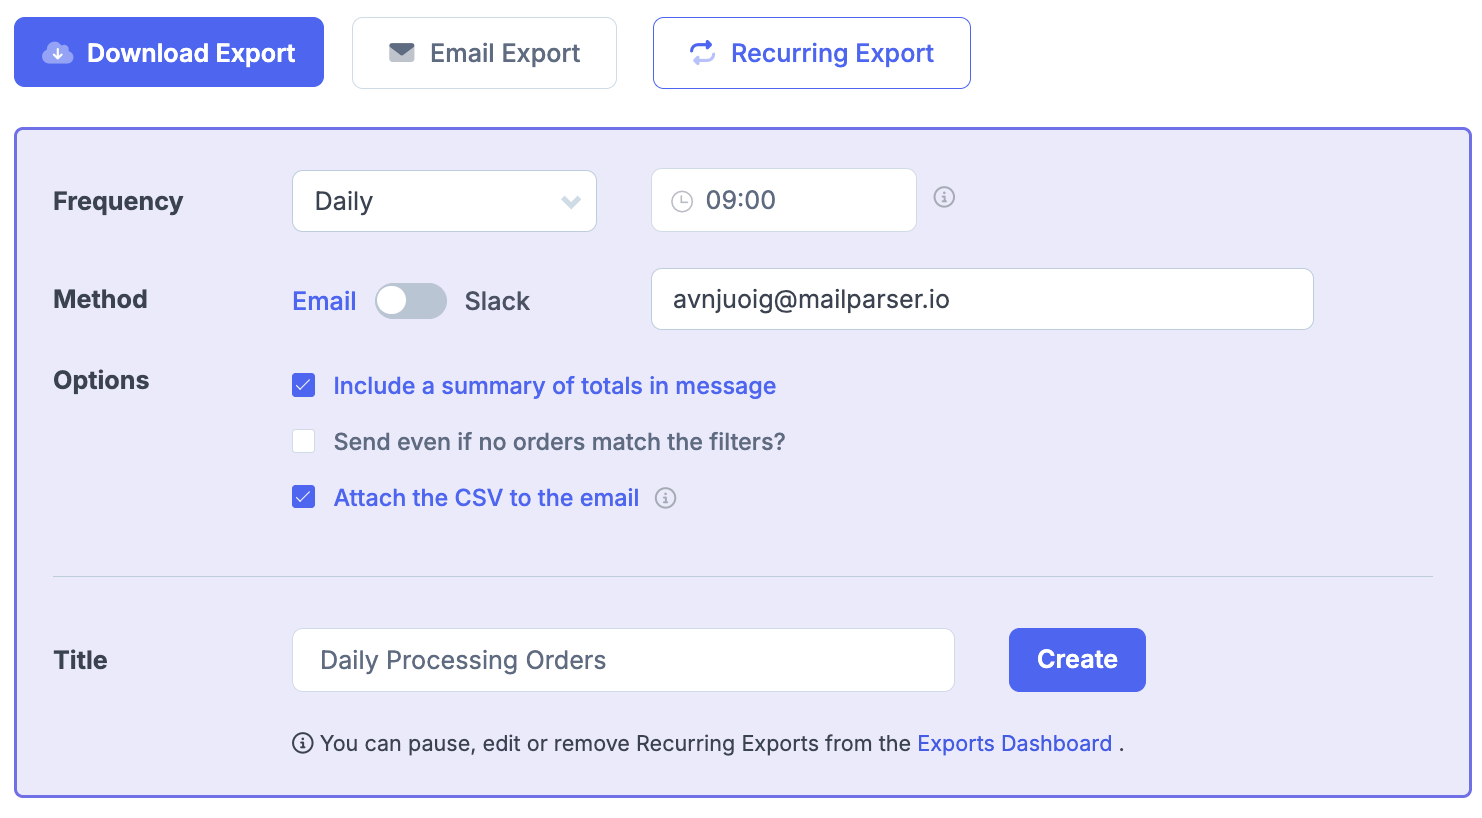
Set up when you want the email to send. And for the email field, put your Mailparser inbox email. Make sure to check the Attach the CSV to the email checkbox. Click Create:
The export will now be sent tomorrow morning at 9am. You can trigger the email to send right away from — https://app.metorik.com/exports/ — by clicking this button:

Parse the email in MailParser
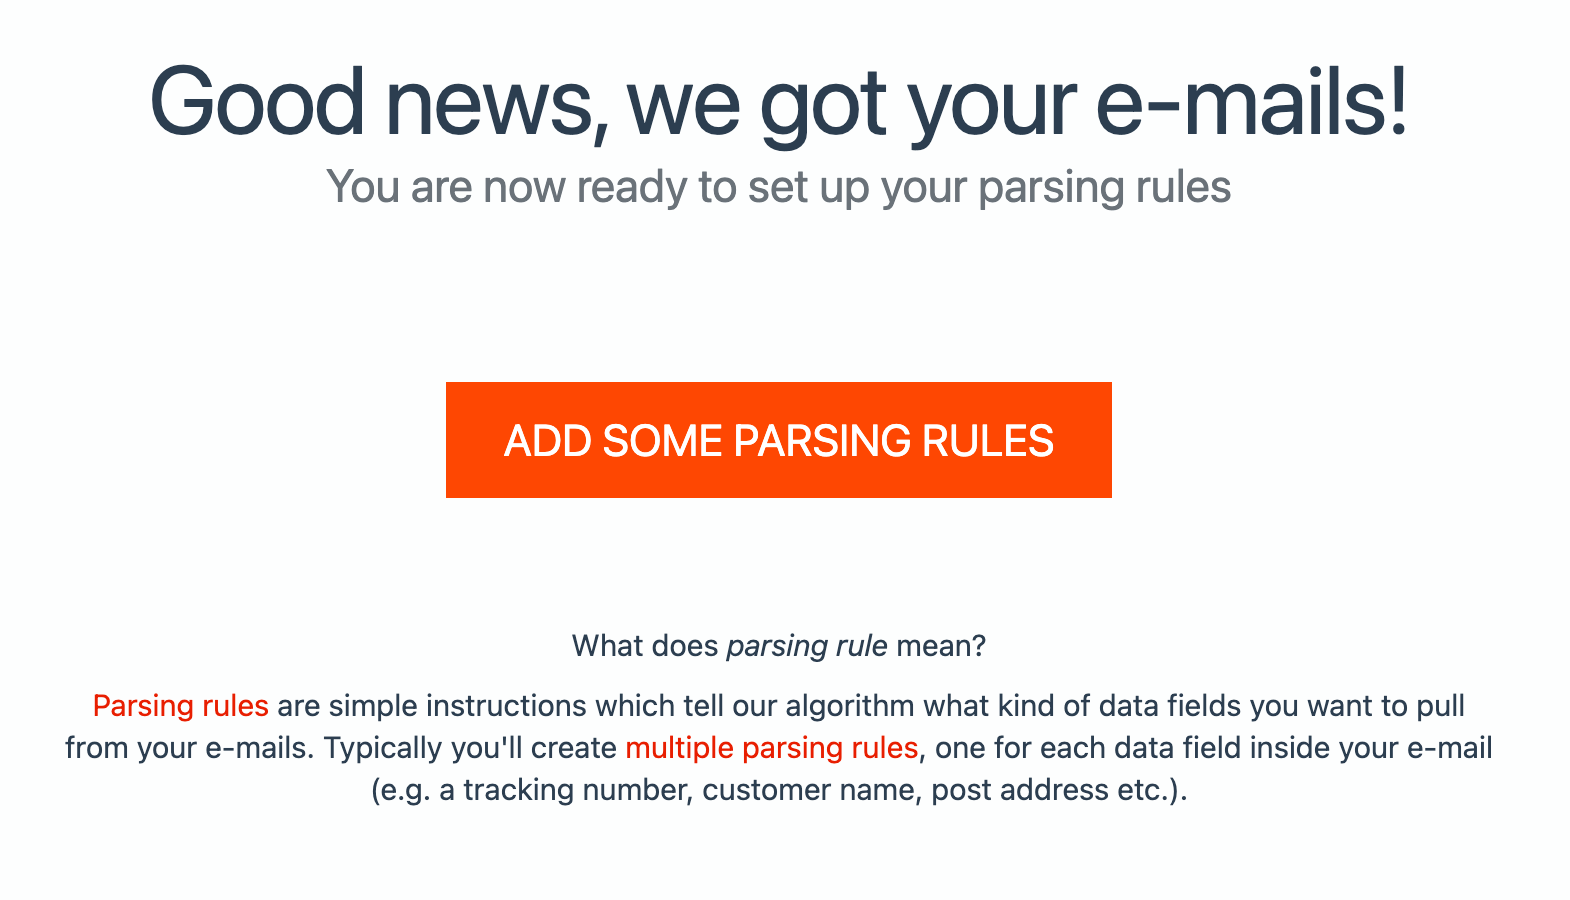
Once an automation has been sent in Metorik, you should see it in your Mailparser inbox. Click Add Some Parsing Rules:
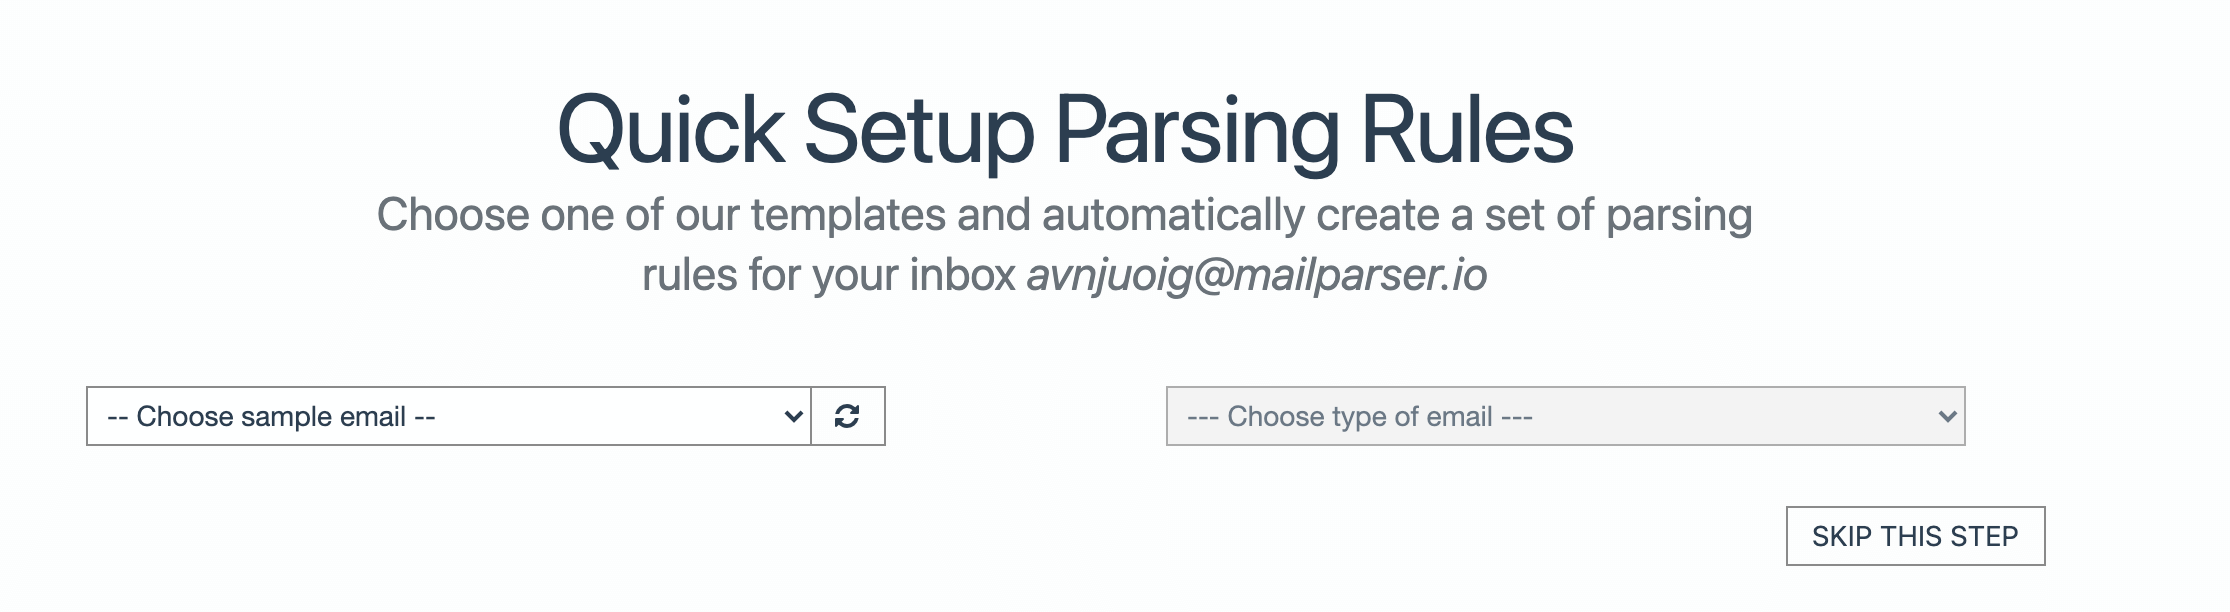
Click Skip This Step:
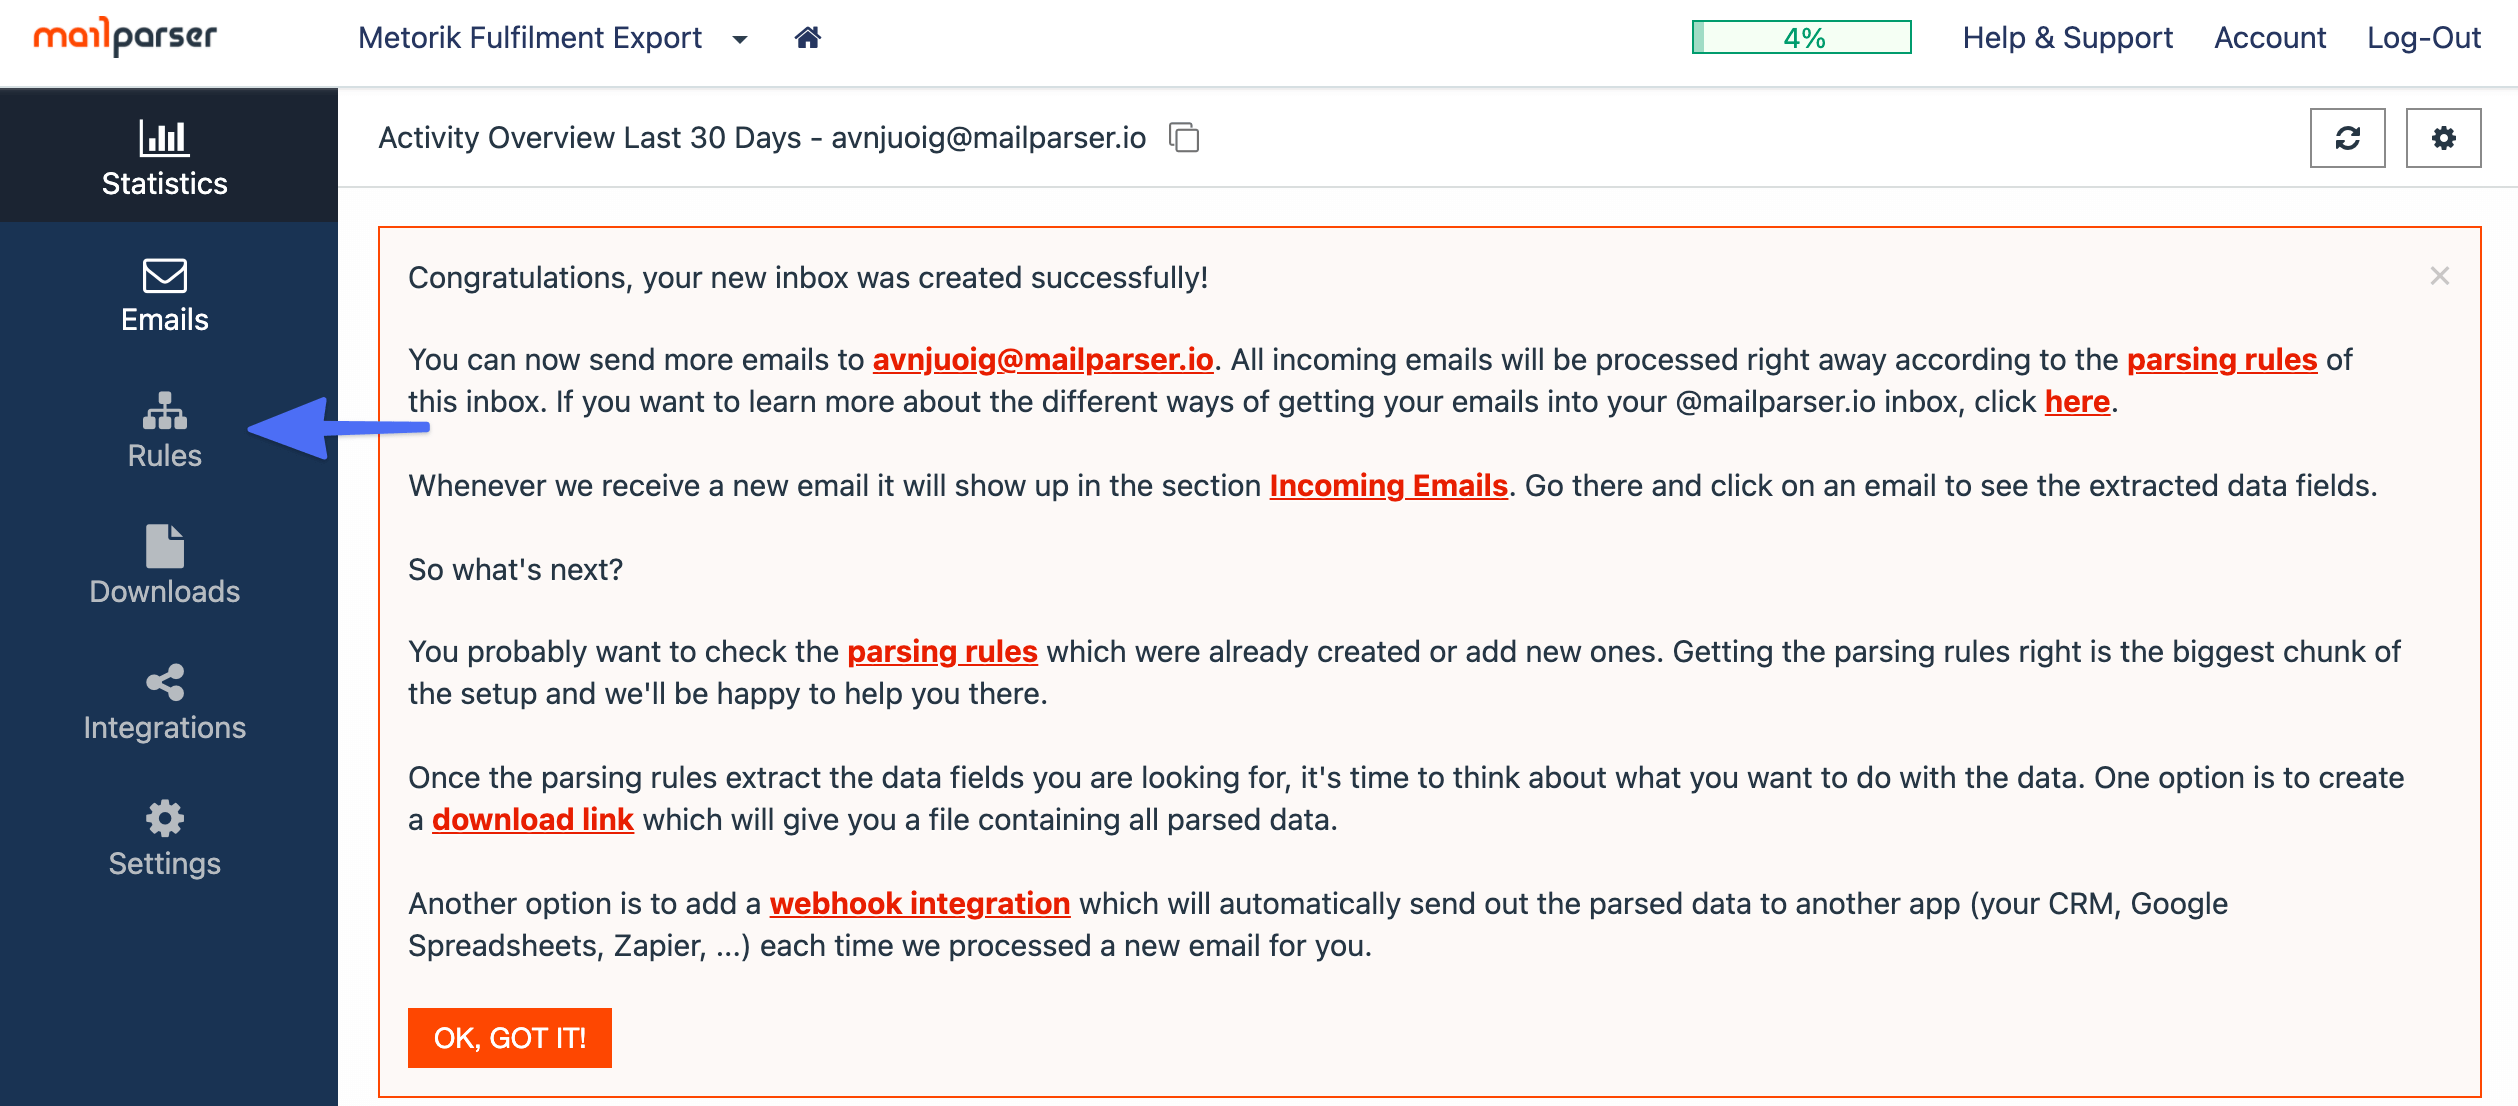
Click Rules on the left sidebar:
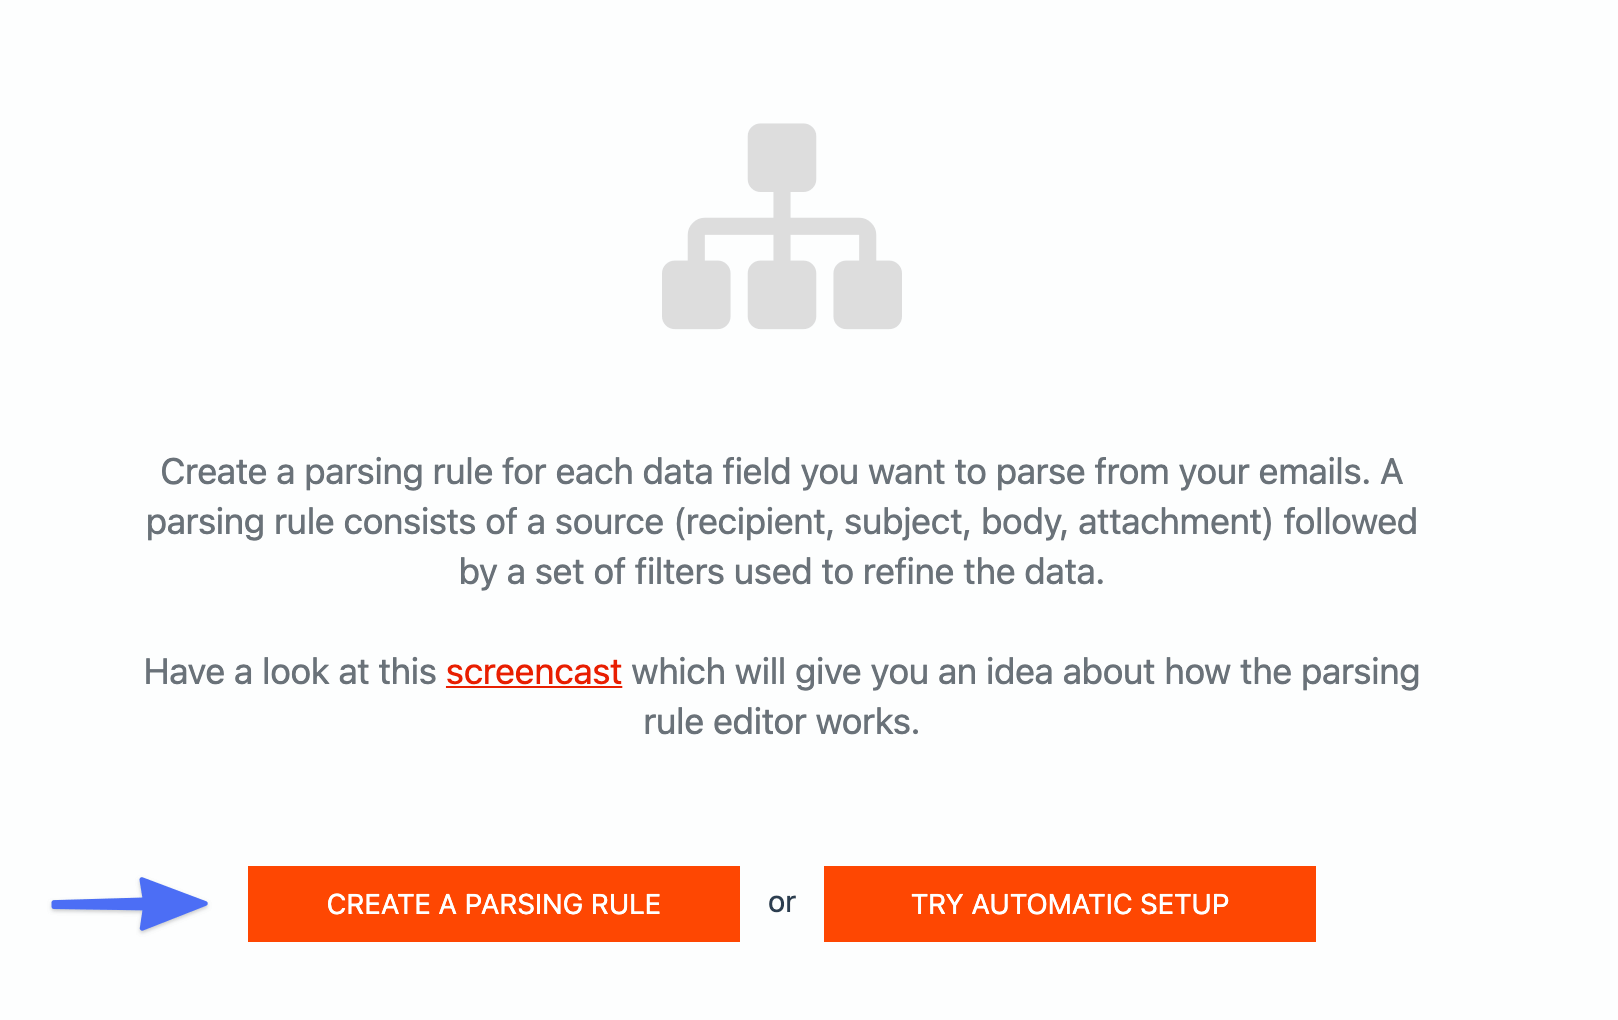
Click Create A Parsing Rule:
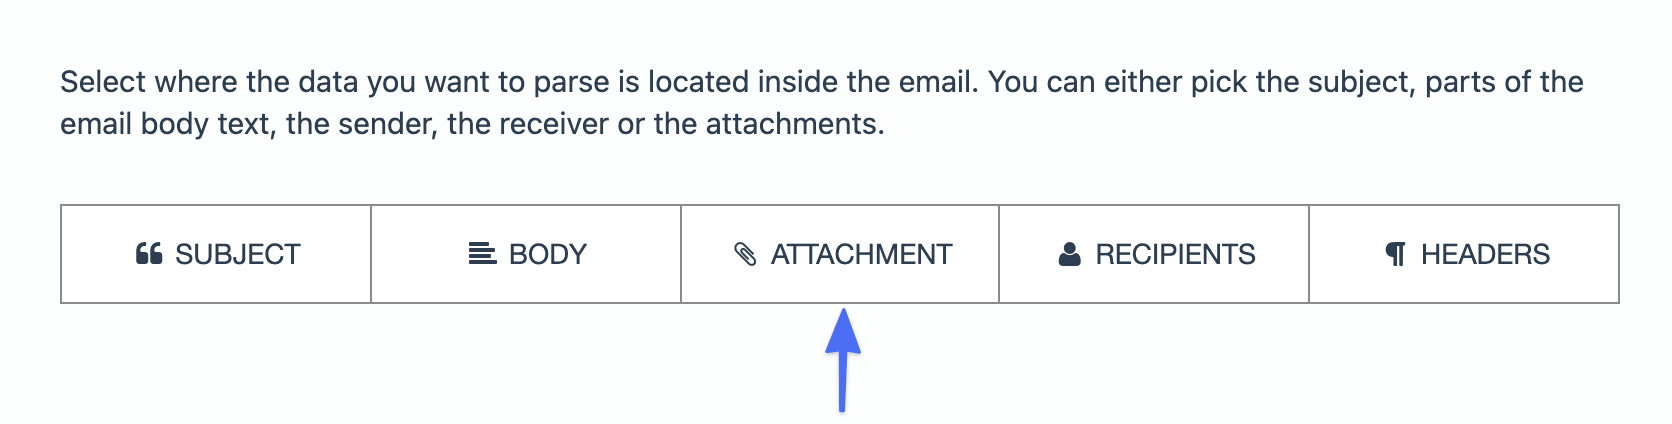
Select Attachment:
You should see some data from the email populate:
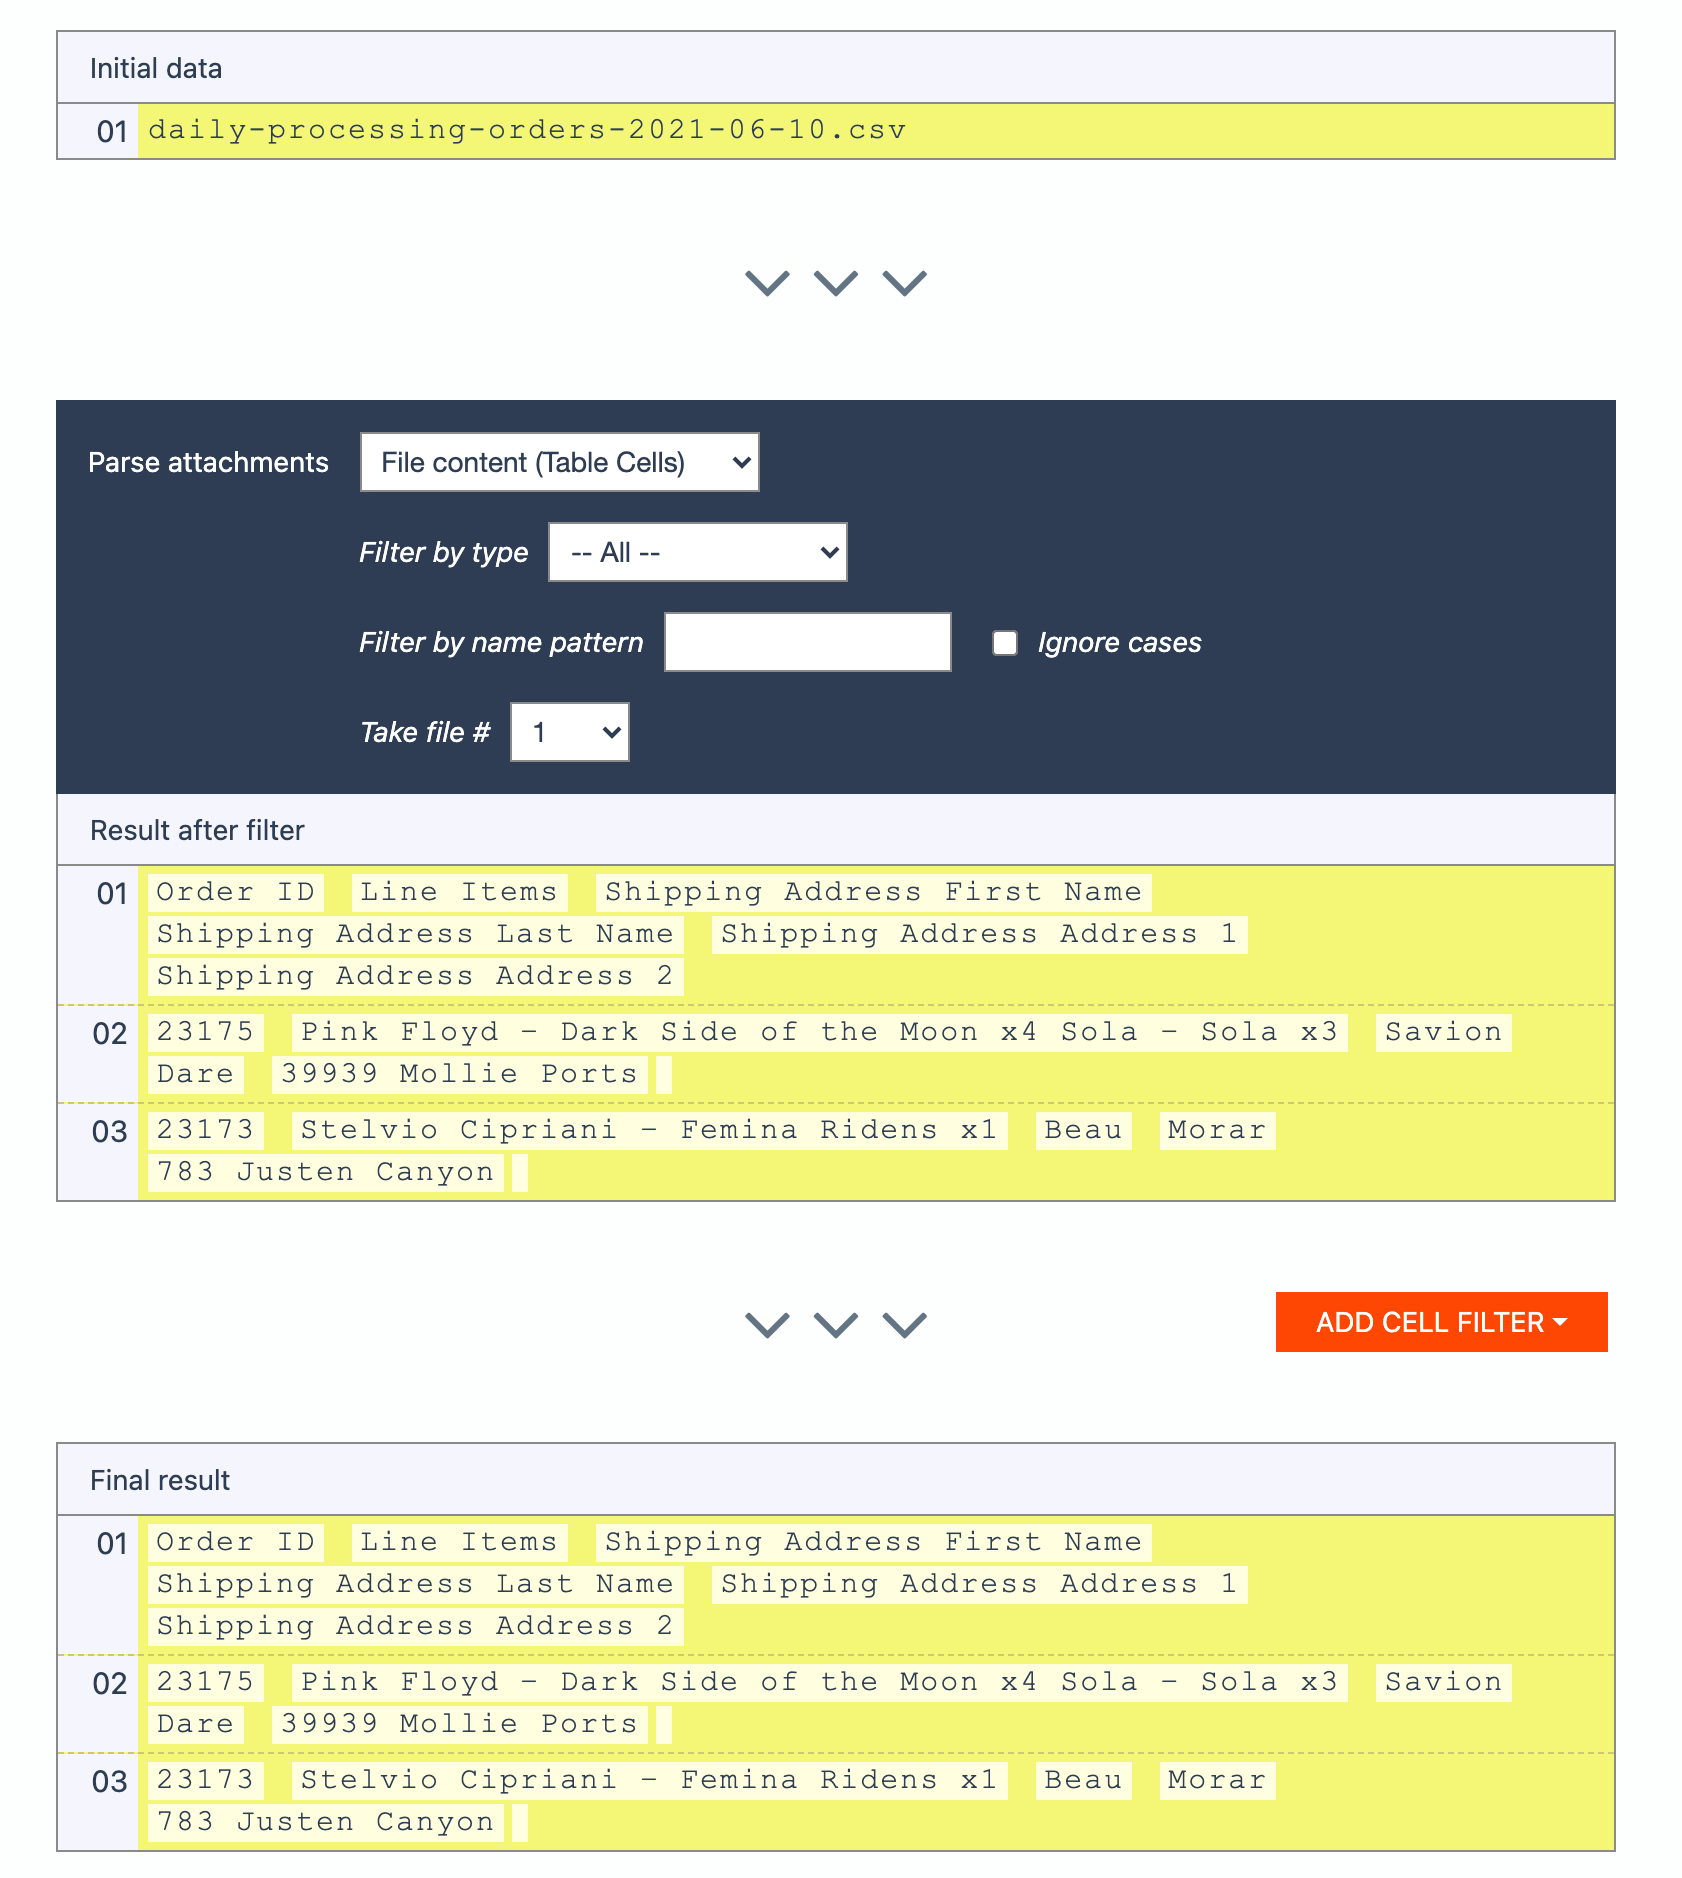
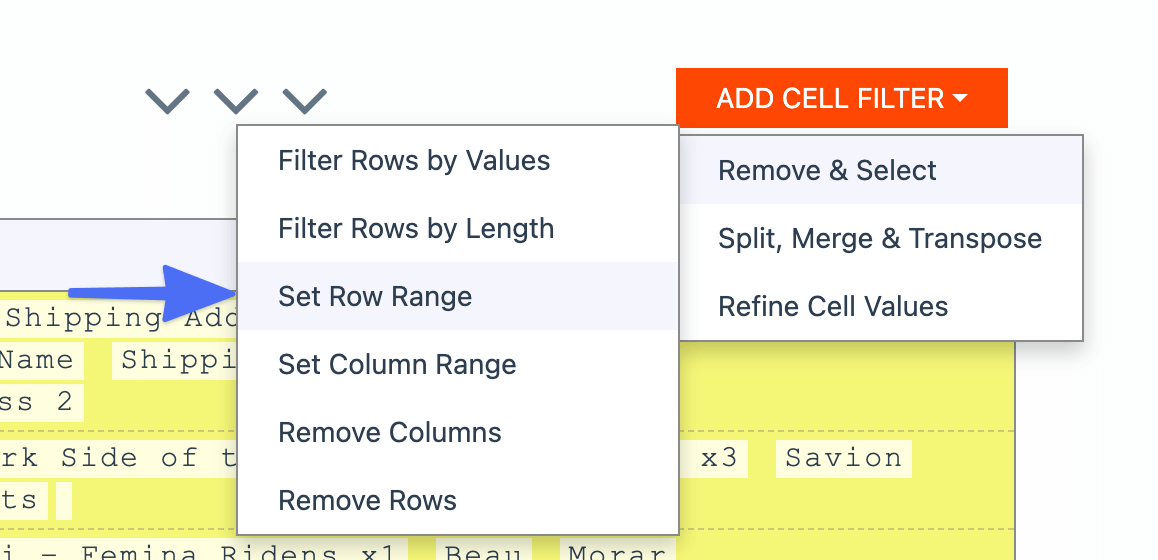
Since we will be adding the column headings into Google Sheets ourselves, we need to remove them from being parsed here. Click Add Cell Filter > Remove & Select > Set Row Range:
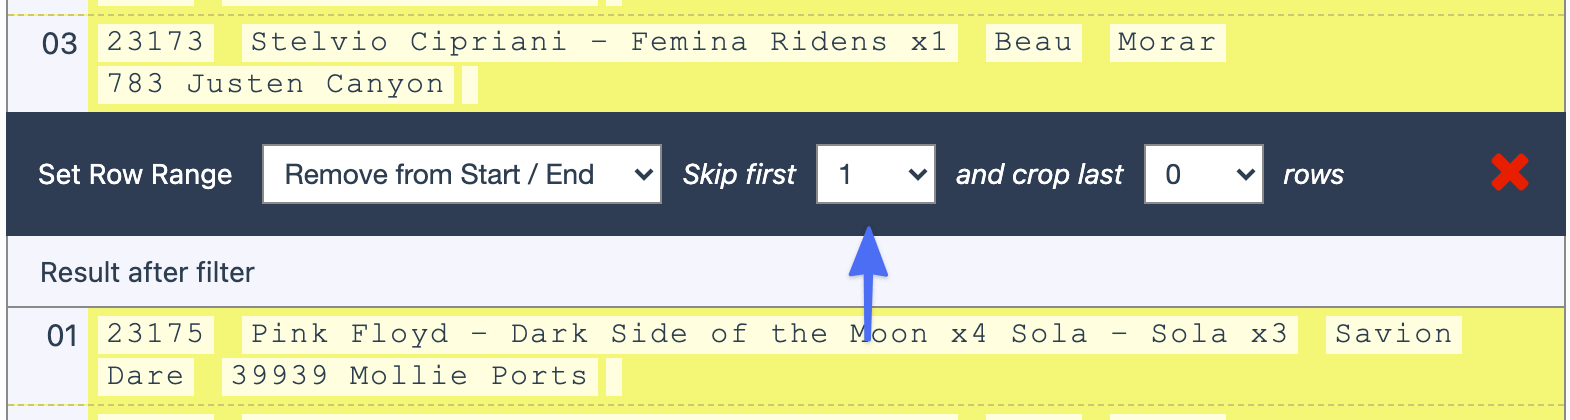
Select 1 in the Skip First Box:
Now click Ok, Looks Good:
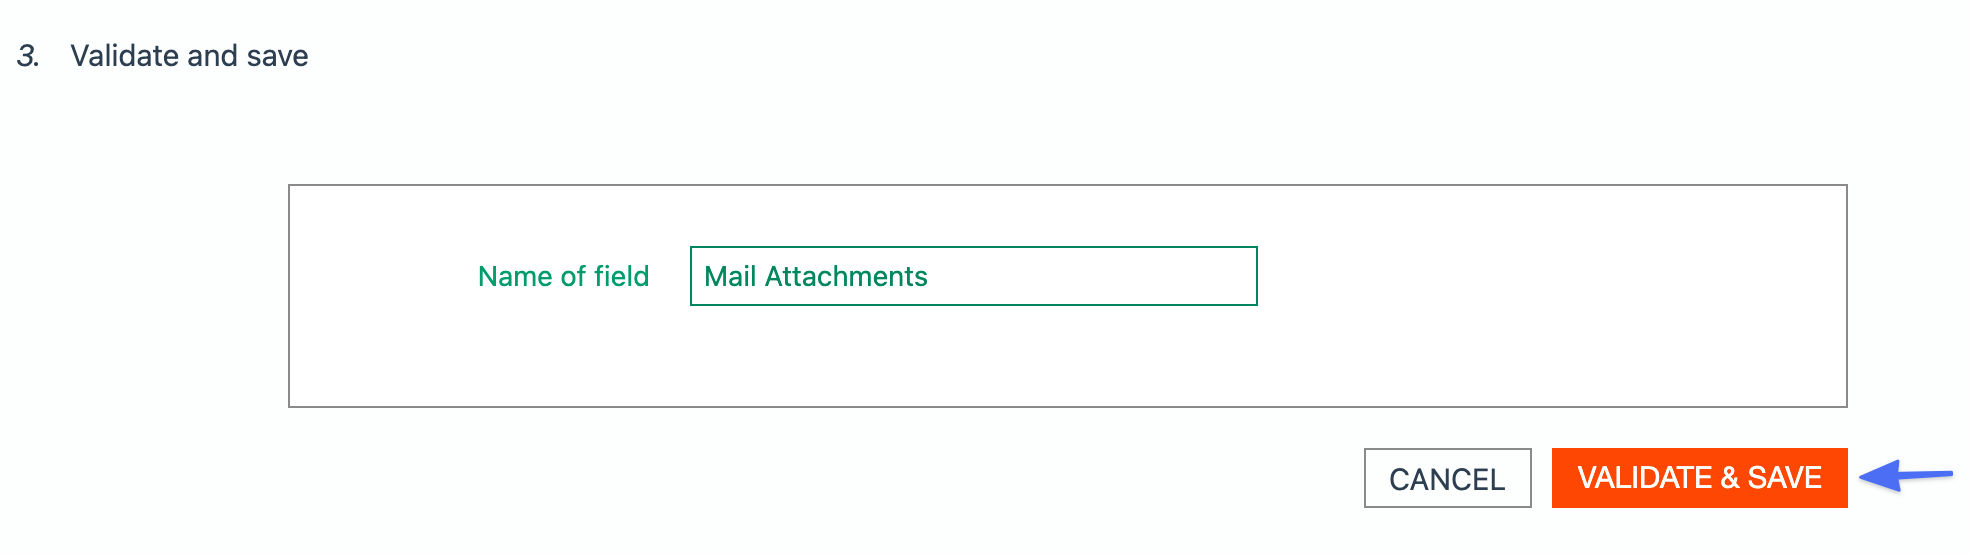
And then Validate & Save:
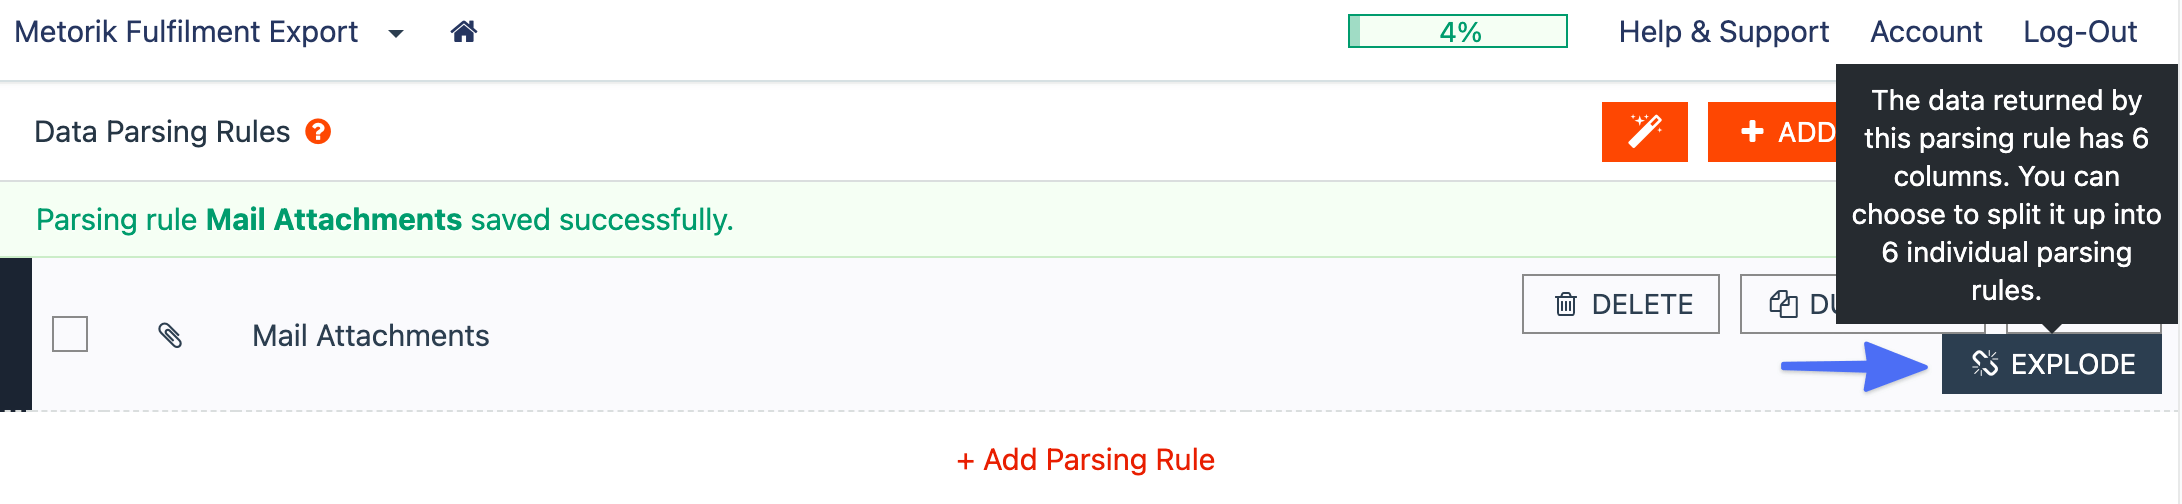
Hover over Mail Attachments and click Explode:
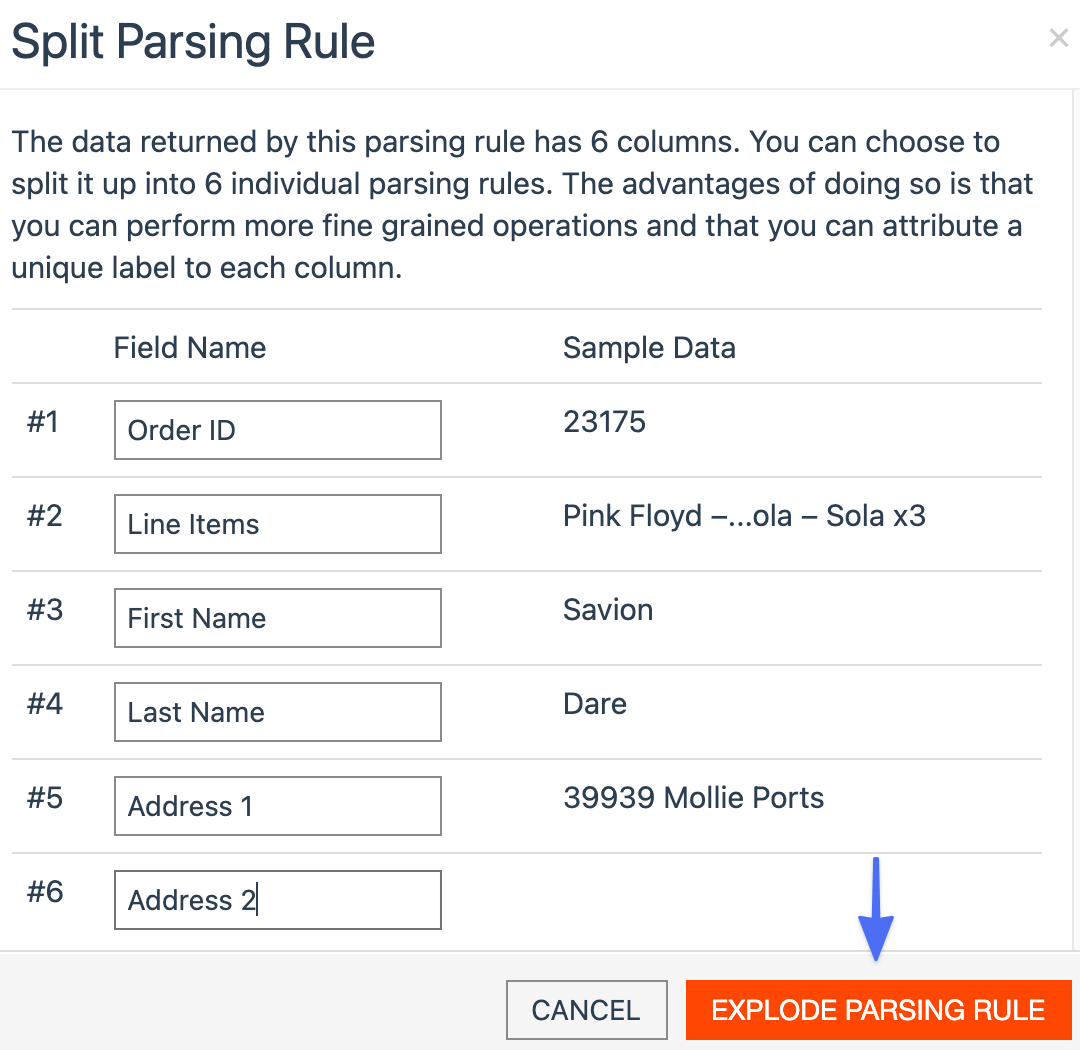
And then add the field names and click Explode Parsing Rules:
Connect Mailparser to Google Sheets
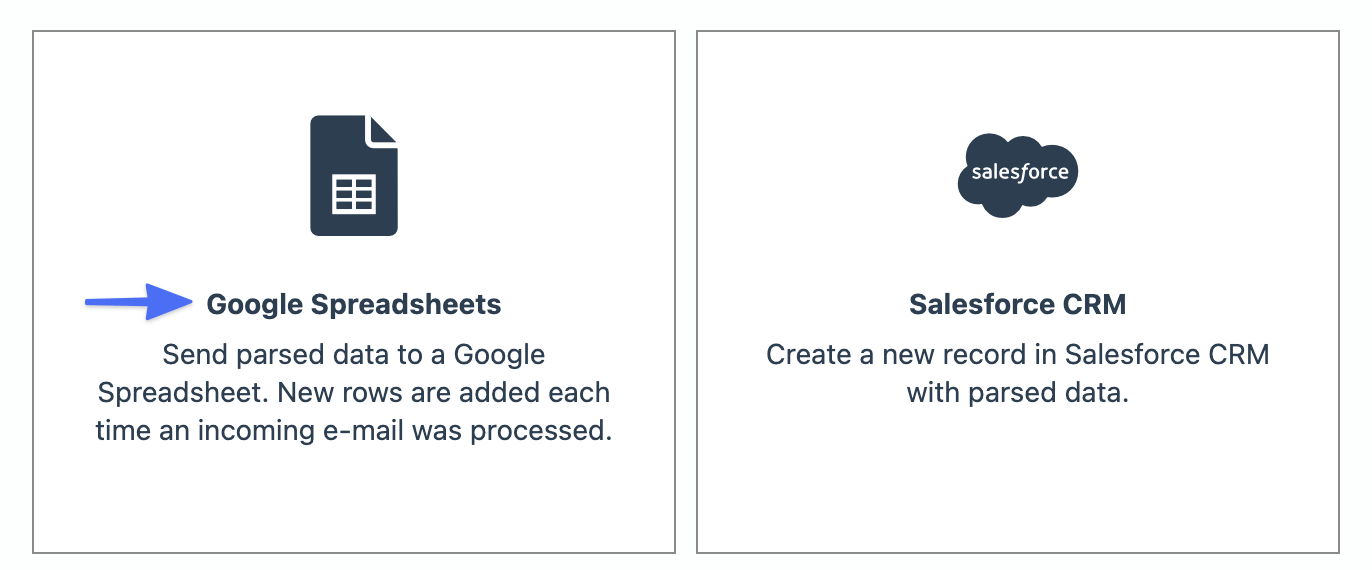
Click Integrations on the left then Add New Integration:

Select Google Spreadsheets:
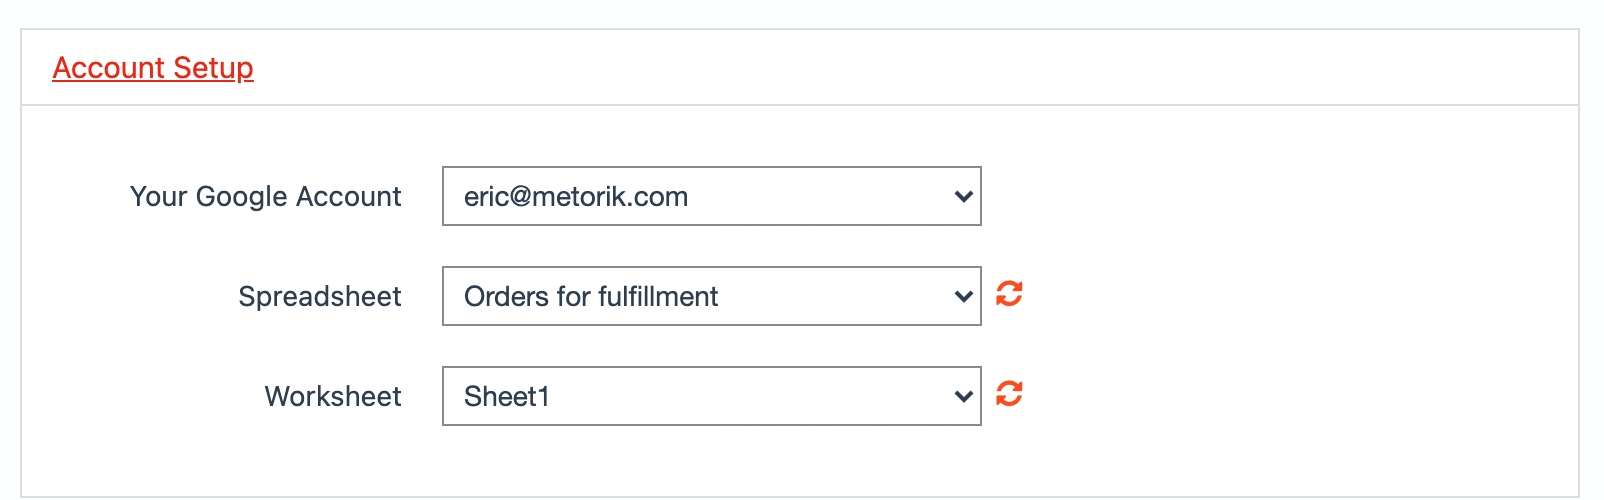
Connect your Google account.
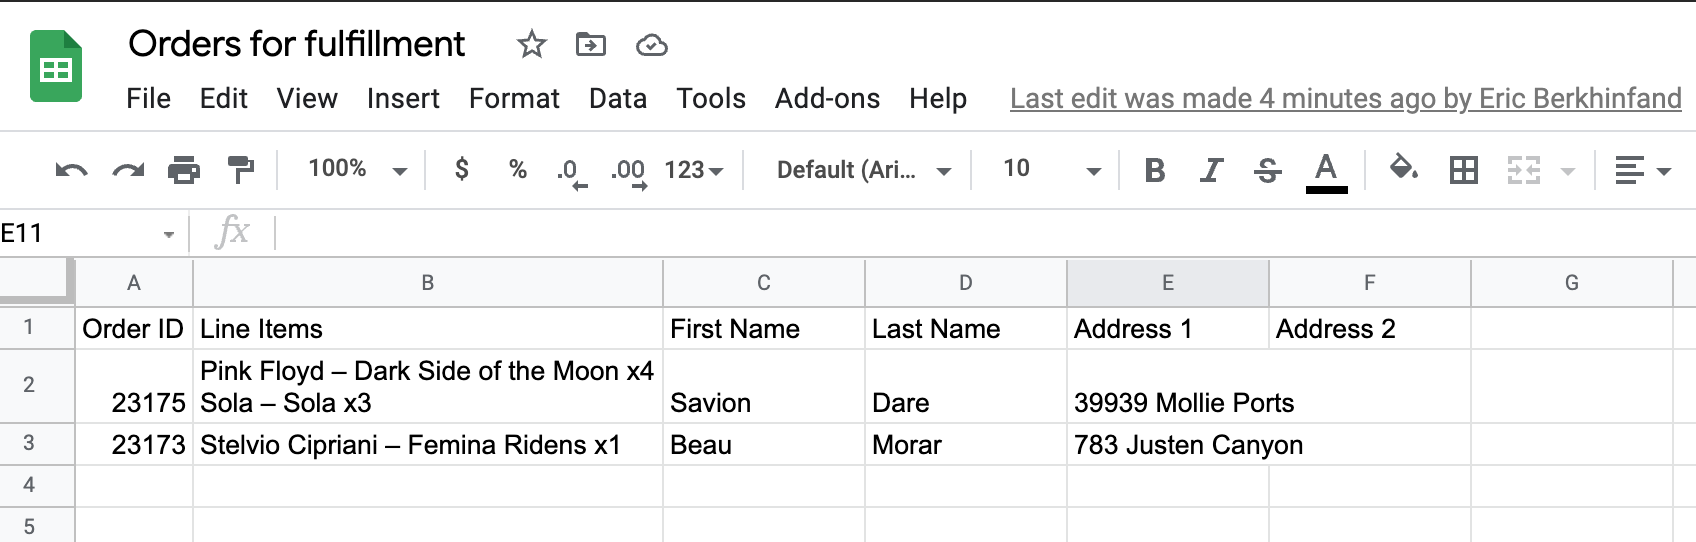
Head into Google Sheets and create a new sheet and add the column names in row 1:

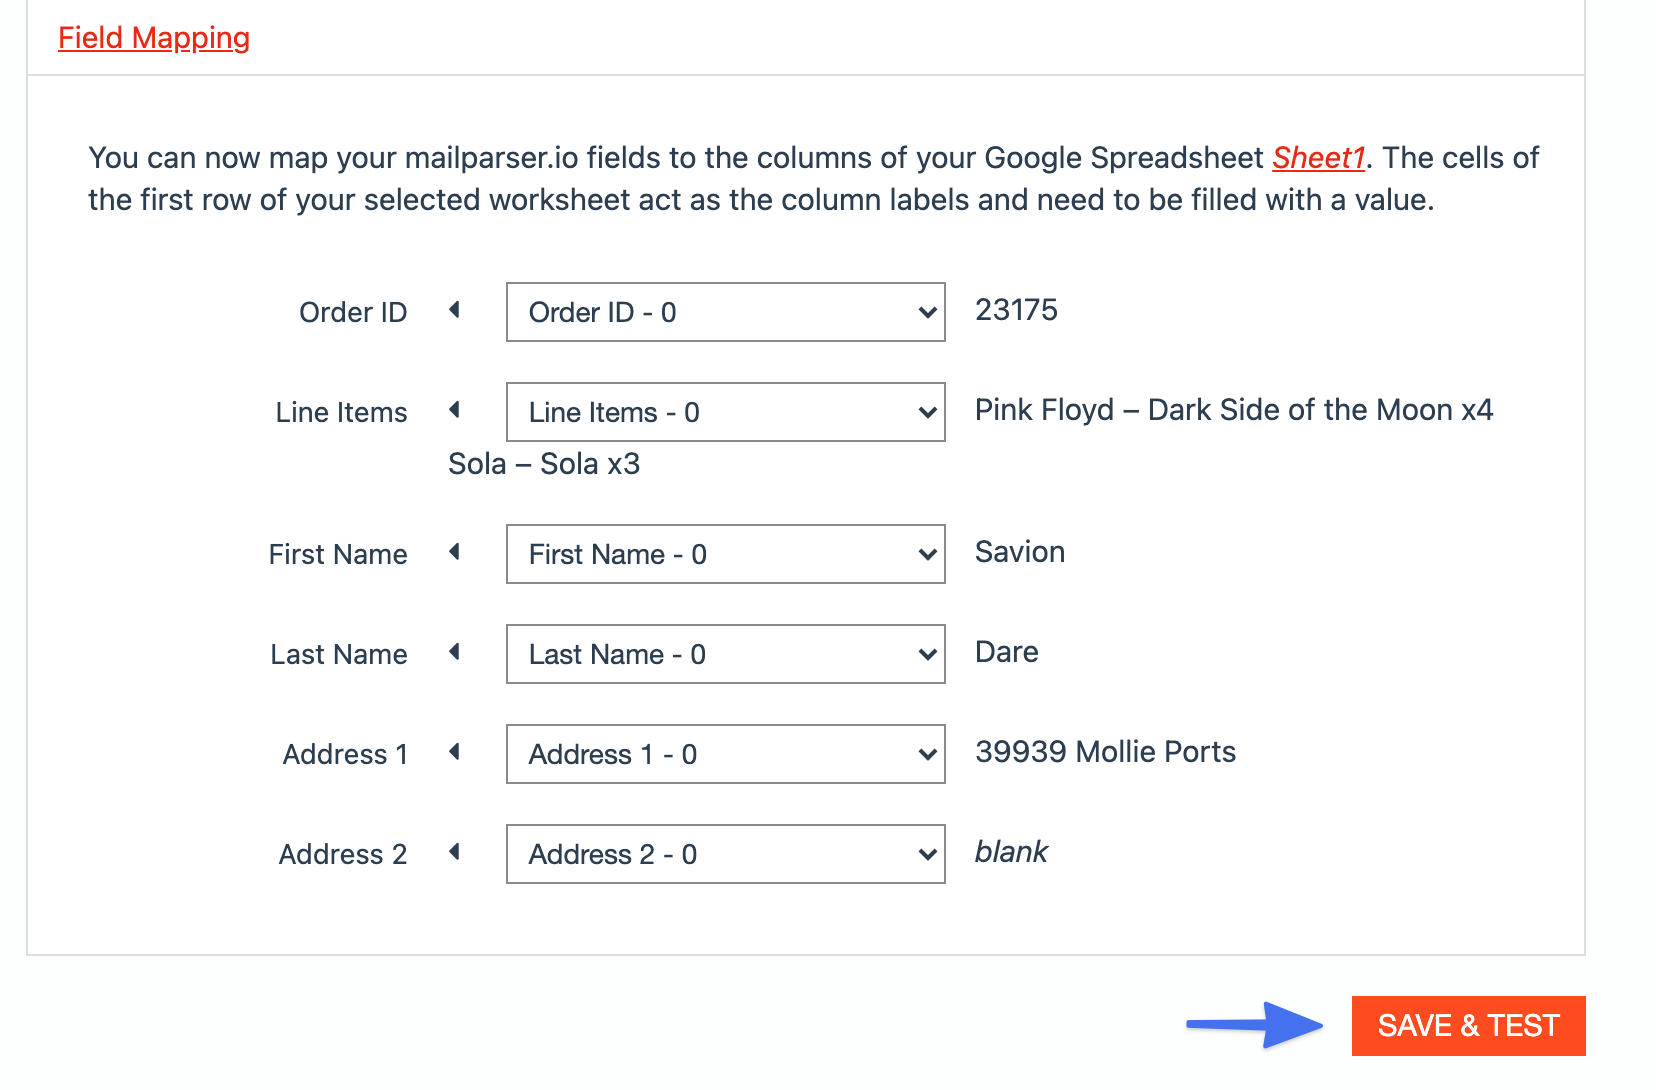
Back in Mailparser, select the sheet you just created from the dropdown, match the columns and click Save & Test:
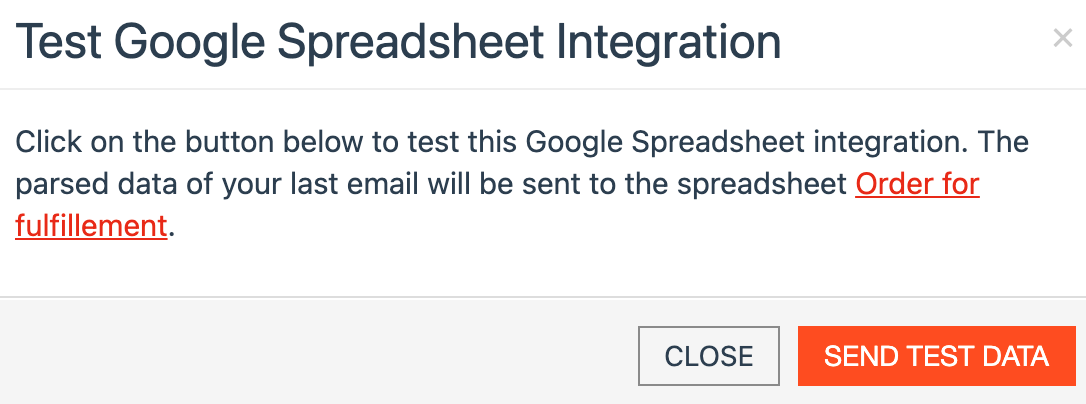
Then click Send Test Data:
And the data from Metorik's export should now appear in the Google Sheet:
That's it, now every time that automation sends from Metorik, it will be added to this Google Sheet.